In this guide, you will learn how to install WatchThemLive’s tracking code using Google Tag Manager.
Step 1: Register/Login
First, you have to create a free account for WatchThemLive.

Or if you have already created one, sign in.
Step 2: Add Your Website
To add your website to WatchThemLive, log in to your account and click the “Add Website” button.

Now you have to add your website’s information.
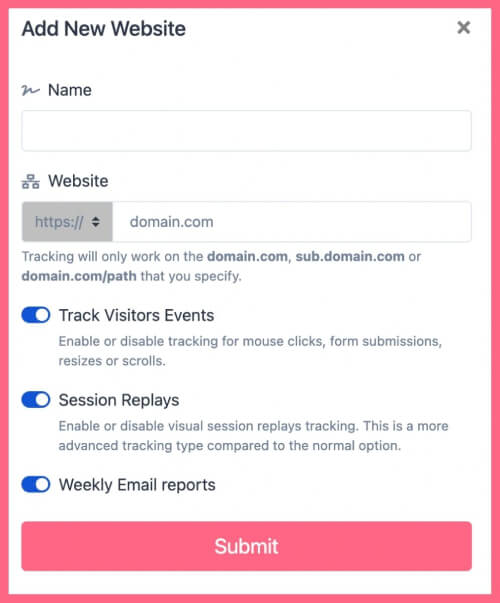
You need to enter your website name and URL. WatchThemLive only works on the website formats below (which includes almost every domain):
- domain.com
- sub.domain.com
- domain.com/path
We will never ask for your website’s password or any other private data.
By clicking “Submit,” your website will be added.
Step 3: Choose Integration Method
Now that your website is submitted, you have to choose the method you want to install WatchThemLive. Select “Via Google Tag Manager.”

Step 4: Install WatchThemLive Using Tag Manager
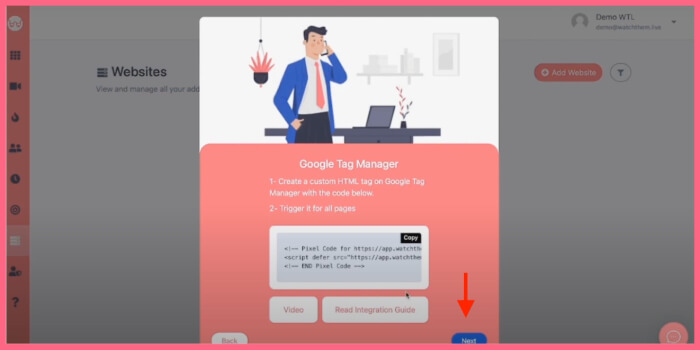
You will see a tracking code that you have to copy and paste to your Google Tag Manager.
![]()
Now go to Google Tag Manager and select “Add a new tag.”
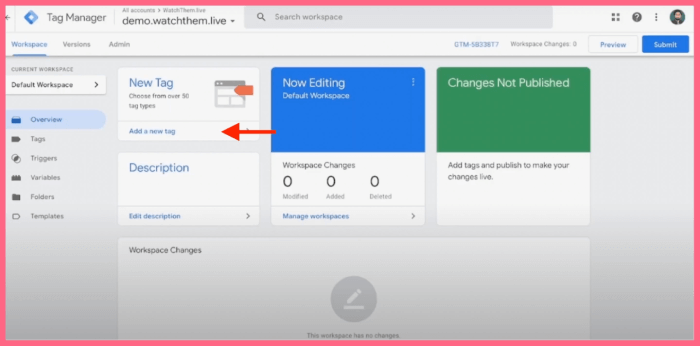
Then, click on the edit icon in the “Tag Configuration” section.
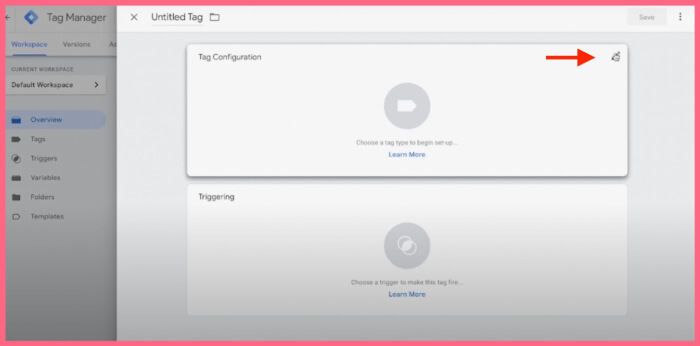
A sidebar opens where you should choose the tag type. Scroll down and select “Custom HTML” from the “Custom” section.
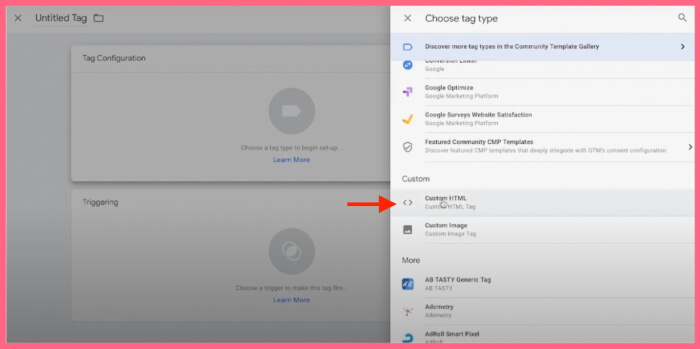
Paste the tracking code in the HTML box.
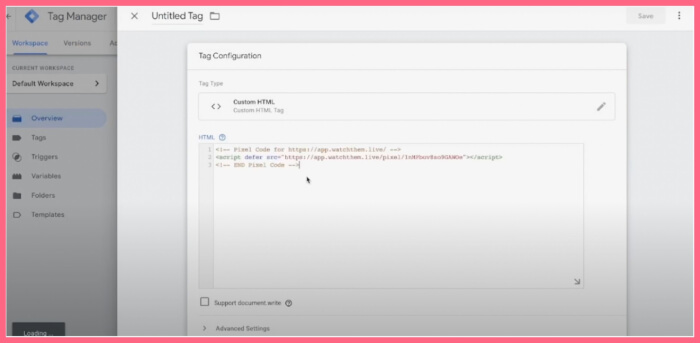
After pasting the code, click “Save.”
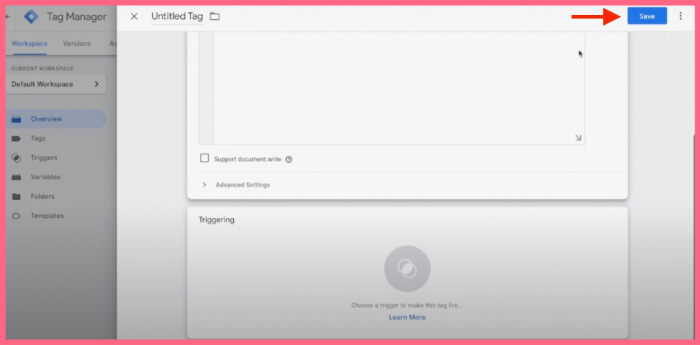
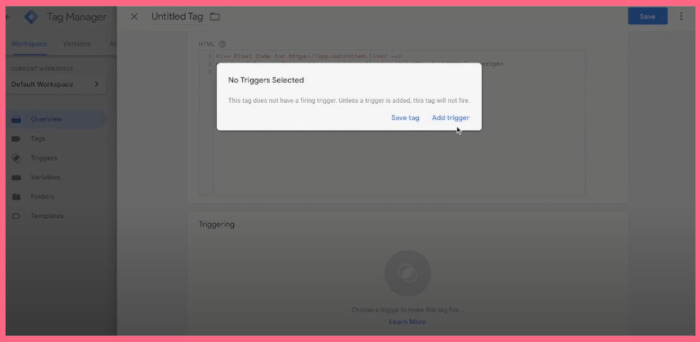
Choose “Add trigger” in the window that pops up.
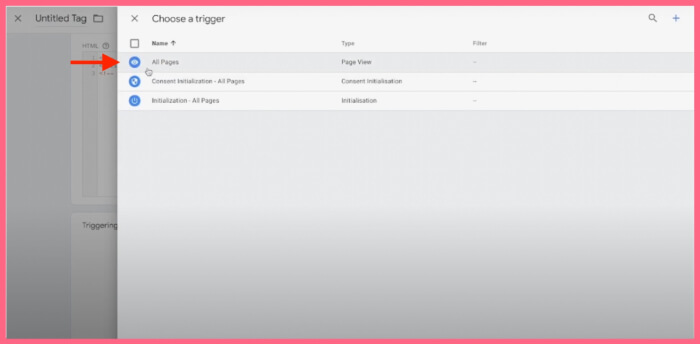
On the sidebar that opens, select “All Pages” and click “Save” again.
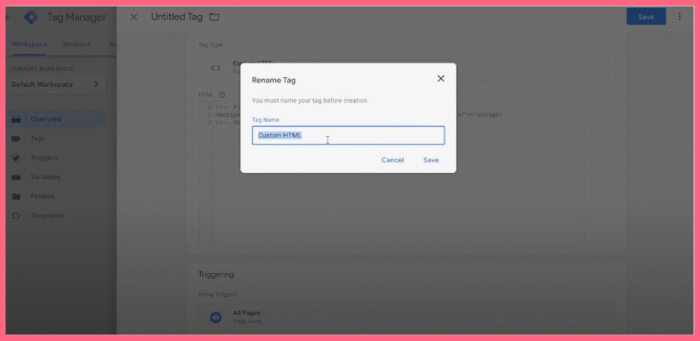
Before creating the tag, you can name it.
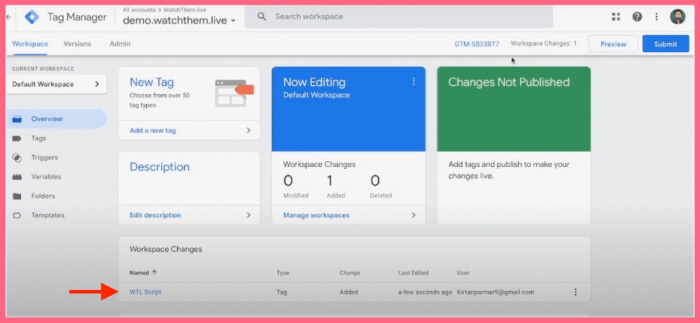
On your Tag Manager dashboard, you can see your tag is added.
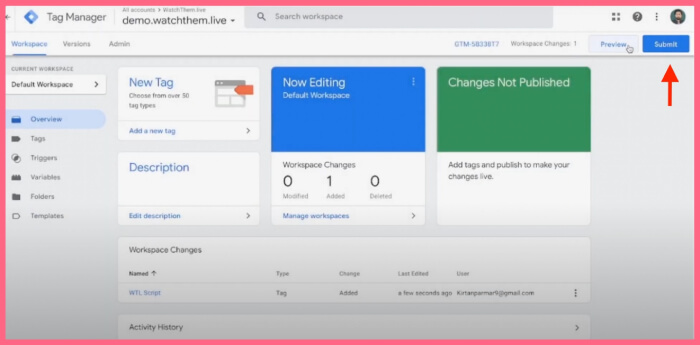
Now click “Submit” in the upper right corner.
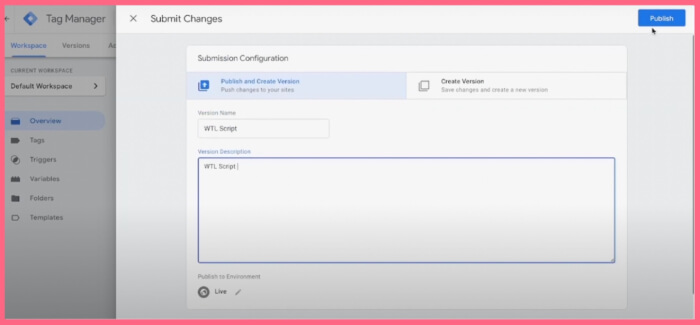
In “Submission Configuration,” enter the version name and description. Then, click “Publish.”
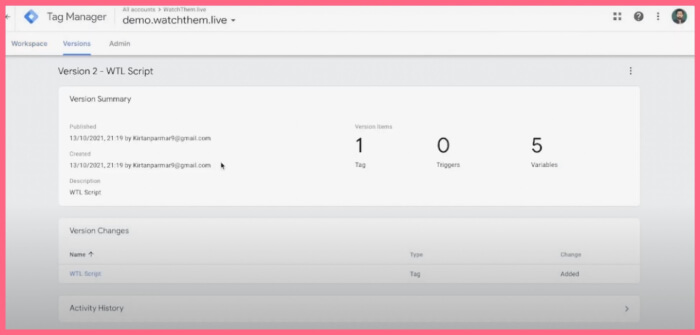
You can see the script is saved and the tag is added.
Now you have to go back to WatchThemLive and click “Next.”
Step 5: Verify Installation
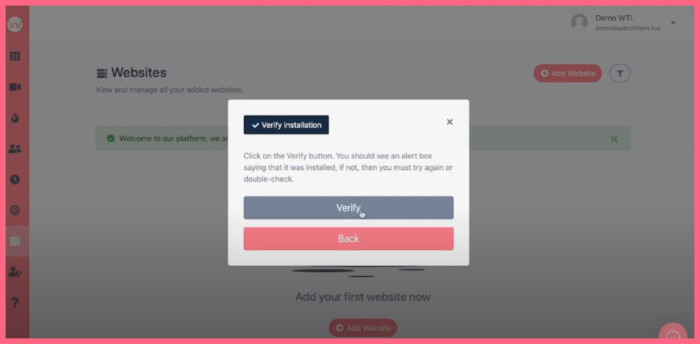
To verify installation, click on “Verify.”
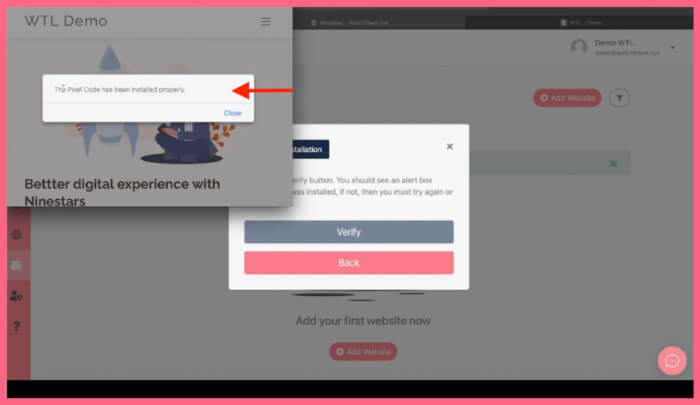
If you have installed WatchThemLive correctly, you will be notified.
And it’s Done!
WatchThemLive starts collecting data, and you will be able to watch video replays and create heatmaps.
Step 6: Become a WatchThemLive Ninja!
To use WatchThemLive in the best way, go through these useful resources:
